

How do I install a smart doorbell?
All smart doorbells will need to be installed either on your door, or next to it. With a wired doorbell, such as the Ring Pro or Nest Hello, we’d advise you hire an electrician to do the installation.
Wired doorbells require existing doorbell wiring, along with a standard 18-volt AC supply to power the camera. Installation requires turning all power off at the fuse board, wiring in the door-chime unit adaptor and then connecting everything up.
While you do get all the kit included in the box, it’s complicated and also dangerous for the novice. Plus, the instructions can often be rather hard to follow. An electrician should be able to install a smart doorbell for between £50-£80.If you’re fairly comfortable at DIY, you can install a battery powered doorbell yourself. Below is typically what you’ll need to do - the approach might different slightly for each doorbell brand or type. For example, the Ring Door View Cam fits into an existing door peephole.
Some battery-powered doorbells have removable batteries, and it’s advisable to have a fully charged spare battery ready to go if you need it. Others, such as the Ring Doorbell (2nd gen), have built-in batteries, so you’ll need to remove the entire doorbell to charge it. You can connect battery doorbells to the mains so that the battery is ‘trickle charged’ to keep it topped up. Again, we’d advise you get a professional in instead of attempting this yourself.
How to install a battery doorbell?
- Unbox the smart doorbell and take out all the items you’ll need to install it, usually including a mounting plate/bracket and any specialist tools. At this stage, you also usually put the battery on to fully charge before fitting.
- While the battery is charging, download the doorbell’s app to your phone and follow the instructions to get connected. This usually involves scanning a QR code on the doorbell using your phone’s camera. Then follow the instructions to get the doorbell on your home wi-fi. Some doorbells will only work on the 2.4GHz band, dual-band offers greater flexibility.
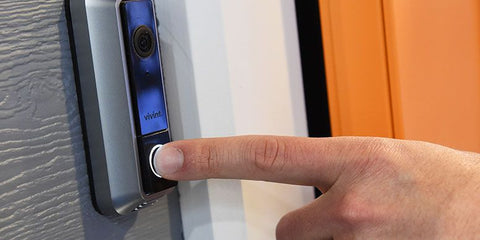
- Now position your doorbell. Around four feet (1.2 metres) off the ground (to the bottom of the doorbell unit) is the best height as this should give good-enough coverage for most door entrances. Remove the mounting bracket from the doorbell and position it on the wall. Doorbells often come with a mini spirit level to ensure the bracket is level. Mark the screw holes with a pencil.
- Once you’re happy with the position of the doorbell, you can screw it in. The approach is different depending on whether you’re fixing to wood, stucco or masonry. Follow the instructions supplied with the doorbell. Finally, attach the doorbell to the mounting bracket and secure it with screws or fixings. Now you should be ready to go.

Can a smart doorbell be hacked?
As well as how easy doorbells are to install, set up and use, we also assess whether their video quality is crisp and clear, both in bright daytime conditions and at night. We test whether the doorbells accurately detect when someone is arriving and send you easy-to-follow alert messages. We also put smart doorbells and their associated apps through an in-depth security assessment, covering aspects such as password policies, data encryption and more. In addition, we also check whether a criminal can physically detach the doorbell from your home and steal it.